|
|
Frequently Asked Questions | ||||||||
Does the 3-in-1 Extruder Upgrade work with flexible filaments? How do I remove the Hobbed Drive Gear from the motor shaft? What shipping options are available? How long until there will be more stock? Do you have any videos of this extruder available? Is this upgrade compatible with other upgrades available? Why is the order form split up into modules? What is an "Extruder Module" and "Hardware Module"? I haven't received my kit yet! When should I expect it? Is there an easy way to prevent misplacing the hollow set screw? Why would I need this extruder upgrade? Can I pay with my debit/credit card? | |||||||||
If you have a question which is not answered here, please email me. | |||||||||
Does the 3-in-1 Extruder Upgrade work with flexible filaments? | |||||||||
|
Yes! Too much pinch force can be a bad thing if it squashes the filament into an oval shape which won't fit into the nozzle inlet. Each kit comes with
three strengths of springs (Weak / Standard / Strong) which can be used along with the set screw to fine tune the pinch force as needed. The springs are easy to
swap without the need to dismantle the printer. There are also printable filament guides (available in the
downloadable archive) which can be installed between the drive gear and the nozzle
inlet to prevent the filament from buckling while feeding. You may want to run a 2mm (5/64") drill bit through the guide by hand to ensure the walls are smooth so filament
will easily slide through. Also, printing at a slower speed than normal can help produce better results. These guides can also be ordered from Shapeways in various materials if desired (bronze is recommended). 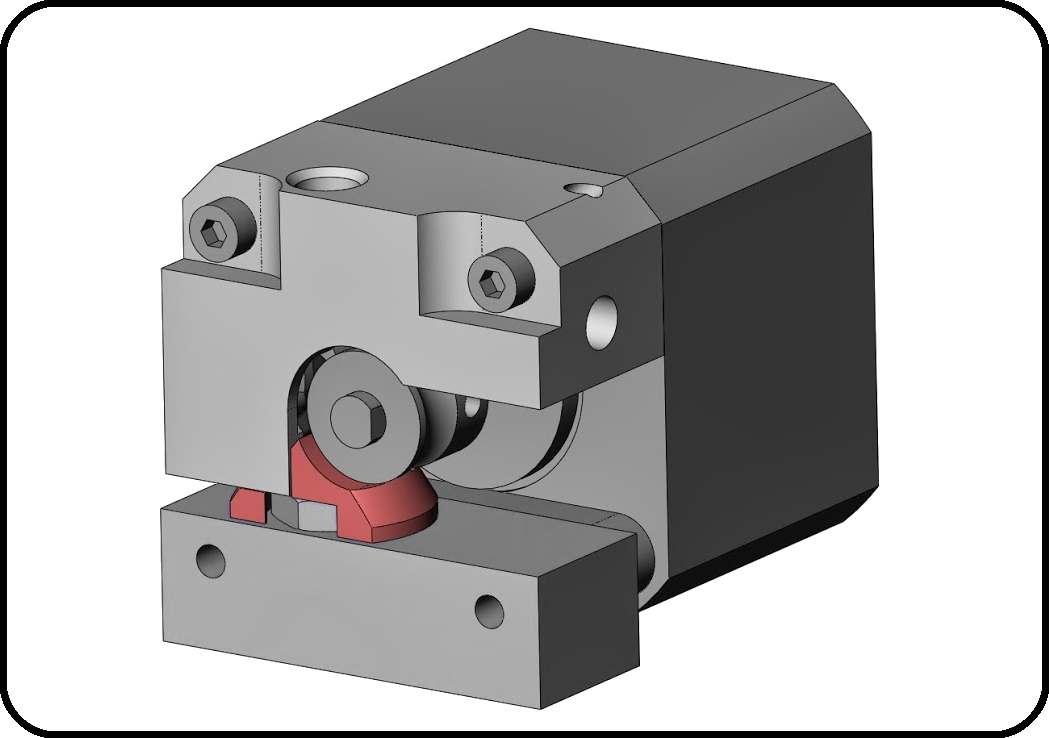 | |||||||||
How do I remove the Hobbed Drive Gear from the motor shaft? | |||||||||
In some cases, the hobbed drive gear is firmly attached to the motor shaft even after fully removing the set screw. The best way to remove it is to
print out the gear puller jig (available in the downloadable archive). Additional
parts you will need are a zip-tie and nut and bolt. The jig can accept both Metric (M5) and Imperial (#10 or 3/16") hardware. This assembly can be
used to gently pull the the drive gear from the shaft in a controlled manner.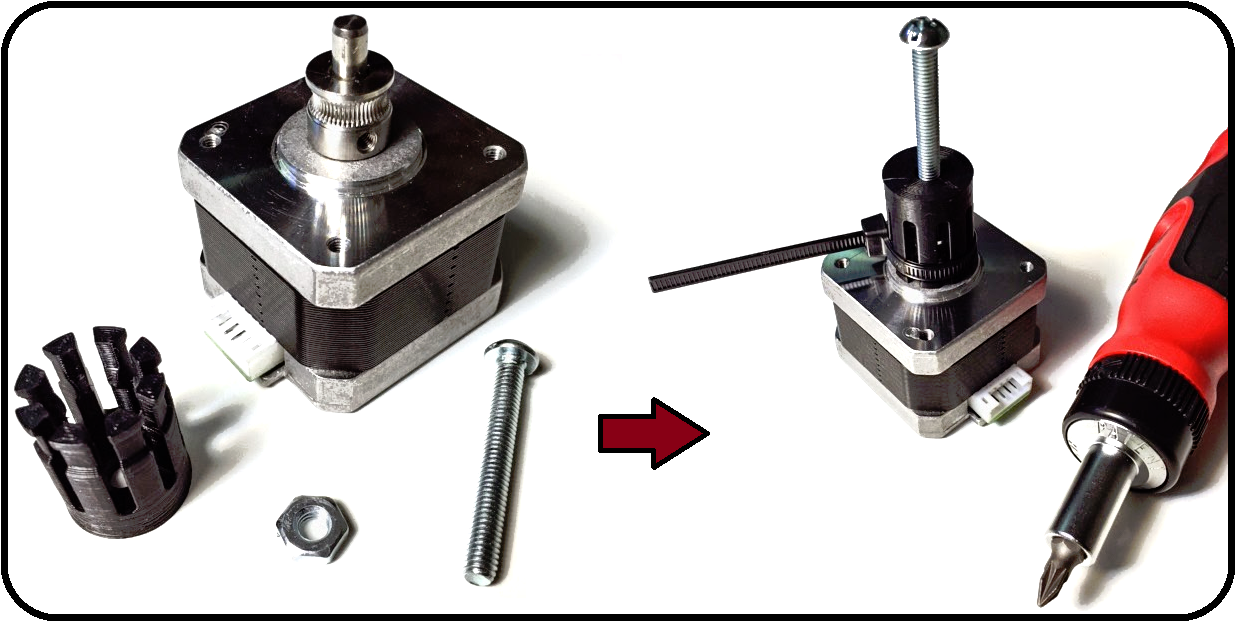 | |||||||||
What shipping options are available? | |||||||||
|
Typically, I ship with Small Packet Airmail by Canada Post. It takes 10-15 business days and there is
no tracking. This is to save on shipping costs. If faster shipping is required, it can be arranged. In the past, I have shipped using expedited methods
which are faster and offer tracking, but the cost varies by destination and can be expensive. If this interests you, please send me an email and I can
get a quote for you.
| |||||||||
How long until there will be more stock? | |||||||||
|
If I am out of stock, I will continue to take orders.
I need between 10-15 paid pre-orders before I will manufacture more. You can monitor the number of pre-orders on the
inventory page (negative numbers indicate paid pre-orders). Once I have enough pre-orders,
I will begin manufacturing and this process takes between 3-4 weeks. Kits will ship out within a few days of the completion
of manufacturing. If I don't receive enough pre-orders to manufacture a run of parts, I will refund any money received.
| |||||||||
Do you have any videos of this extruder available? | |||||||||
|
Yes! Here are a few videos to show you the upgrade. These videos were taken when this upgrade was still in the prototype phase which is why
they are in plastic. Enjoy! | |||||||||
Is this upgrade compatible with other upgrades available? | |||||||||
|
Yes. This upgrade plays well with others. The only upgrade which requires additional spacers is Carl's Cooling Block (as it does with all feeders).
Please let me know if you have this upgrade when you order, or by sending me an email. Edit (May 21, 2015): Carl has revised his cooling blocks to no longer require additional spacers. | |||||||||
Why is the order form split up into modules? What is an "Extruder Module" and "Hardware Module"? | |||||||||
Below are the 2 components which make up an extruder module (these can also be printed if you want to try before you buy).
The large block is made of aluminum and the smaller part is made of PEEK polymer. The PEEK component holds the bearing and
rotates in a pocket in the aluminum block. Some people were concerned that the plastic part would wear out eventually and
wanted to order spares. I believe that the PEEK component will outlast any printer and therefore a spare need not be kept
on hand.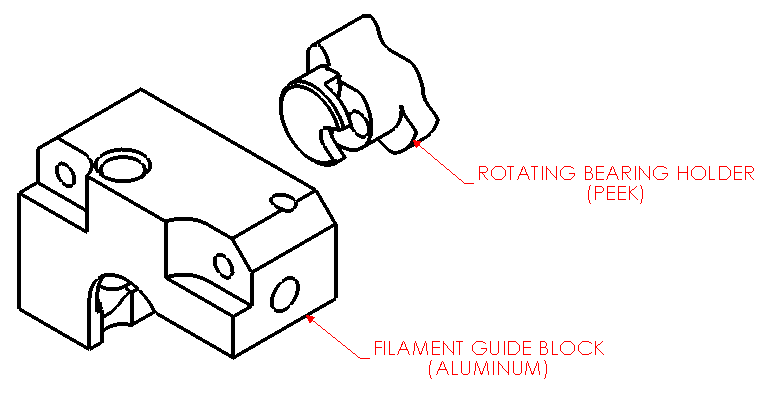 A complete feeder consists of an extruder module AND a hardware module. If you purchase complete sets (extruder modules + hardware modules) I assemble them and test them before sending the kit out. | |||||||||
I haven't received my kit yet! When should I expect it? | |||||||||
My standard shipping is Small Packet Airmail by Canada Post. It takes
between 10-15 business days to be delivered. Once I've dropped your kit at the post office, I update your invoice
in PayPal to show the date it shipped. This date can be found in the
Transaction Details section at the bottom of your invoice.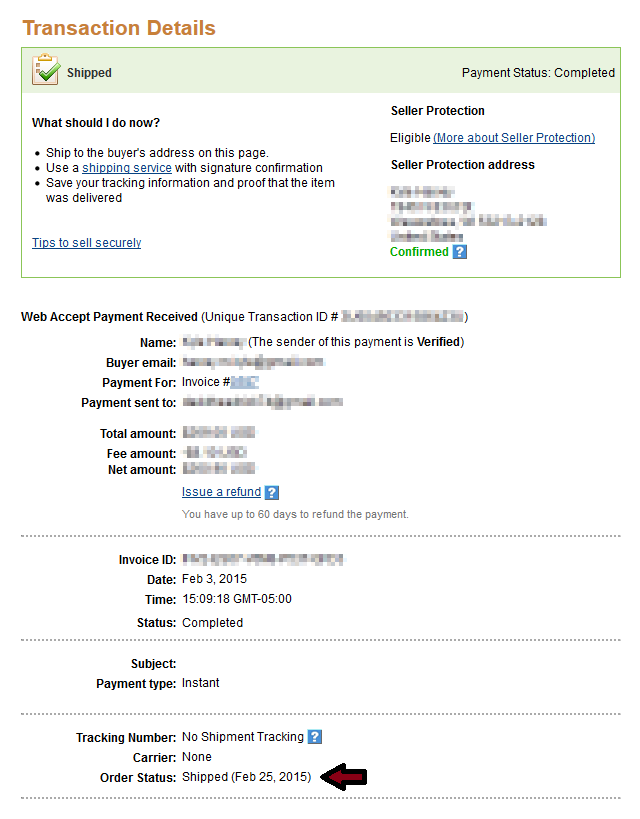 | |||||||||
Is there an easy way to prevent misplacing the hollow set screw? | |||||||||
Yes! The tiny hollow set screw can easily get misplaced. To help prevent this, you can print out a handle for your hex key which can help. The printable hex handle
(available in the downloadable archive) can be installed on you hex key as shown. It is also usefull
for re-installing the set screw when swapping springs (the strong spring does not fit over the hex key).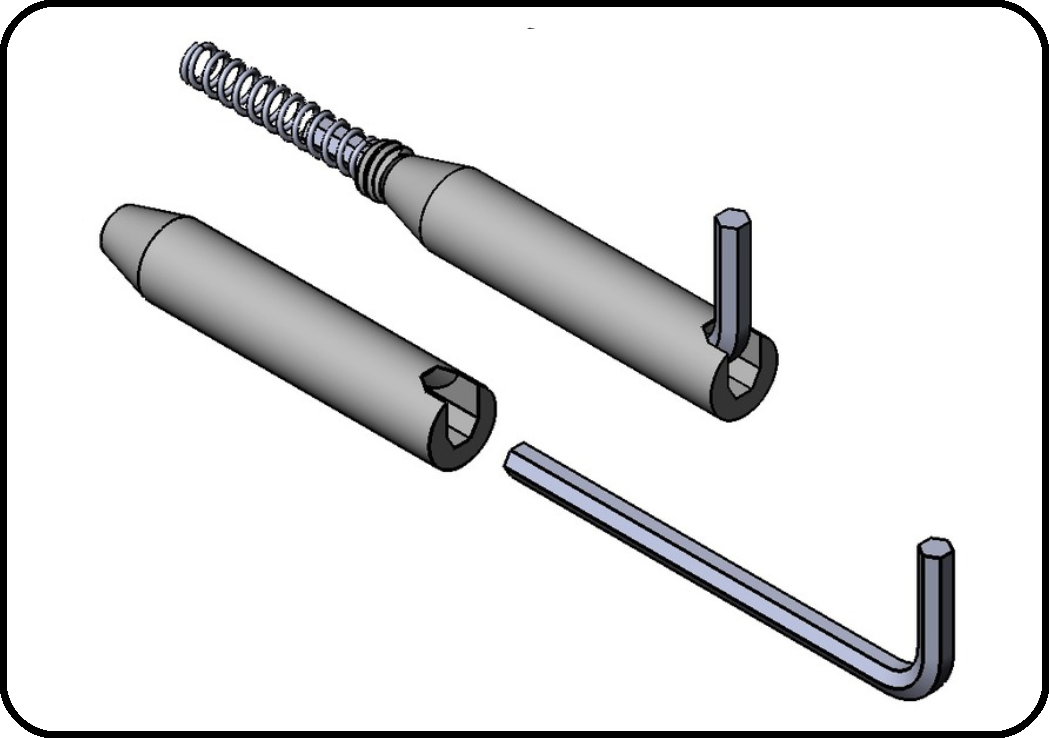 | |||||||||
Why would I need this extruder upgrade? | |||||||||
If your extruder is not feeding reliably then you would benefit from this upgrade. If you have a Replicator 2 with the plunger style extruder (pictured below), then you
definitely need this upgrade. The plunger with an o-ring is incapable of dealing with slight thickness variations in the filament. If the filament drops below the size
where the plunger can apply pressure, it will stop feeding. Also, the filament wears a groove in the plunger ensuring that this will eventually happen.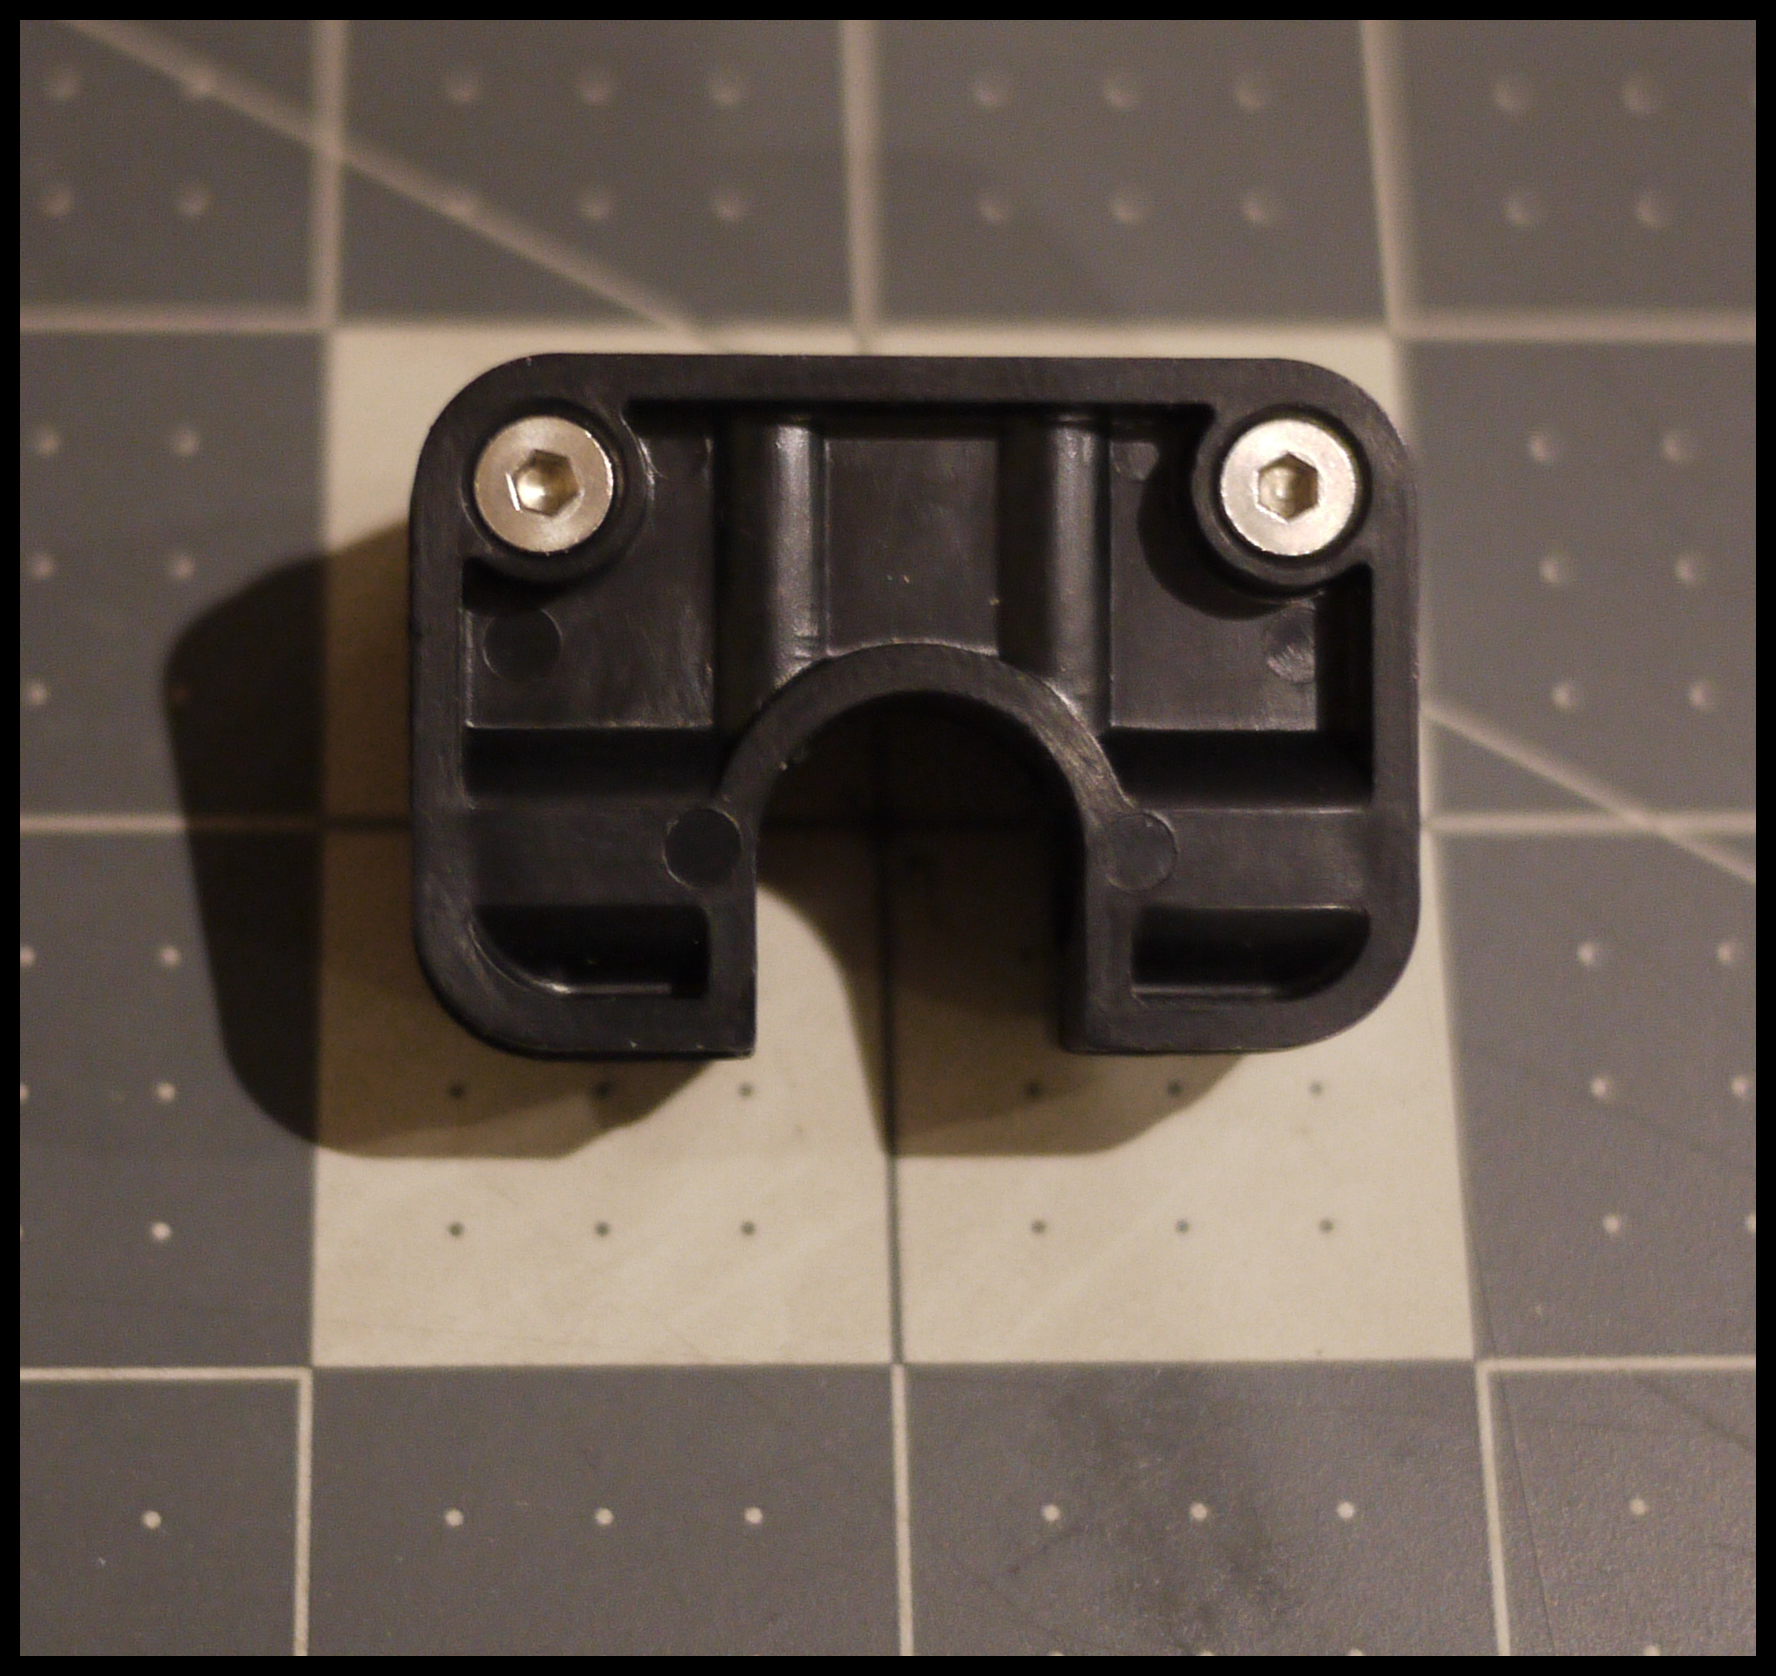
If you have a Replicator 2 with the lever style extruder (pictured below), then you may eventually need this upgrade. The spring in this mechanism is prone to becoming weak over time and eventually will not provide adequate pressure, and will stop feeding. 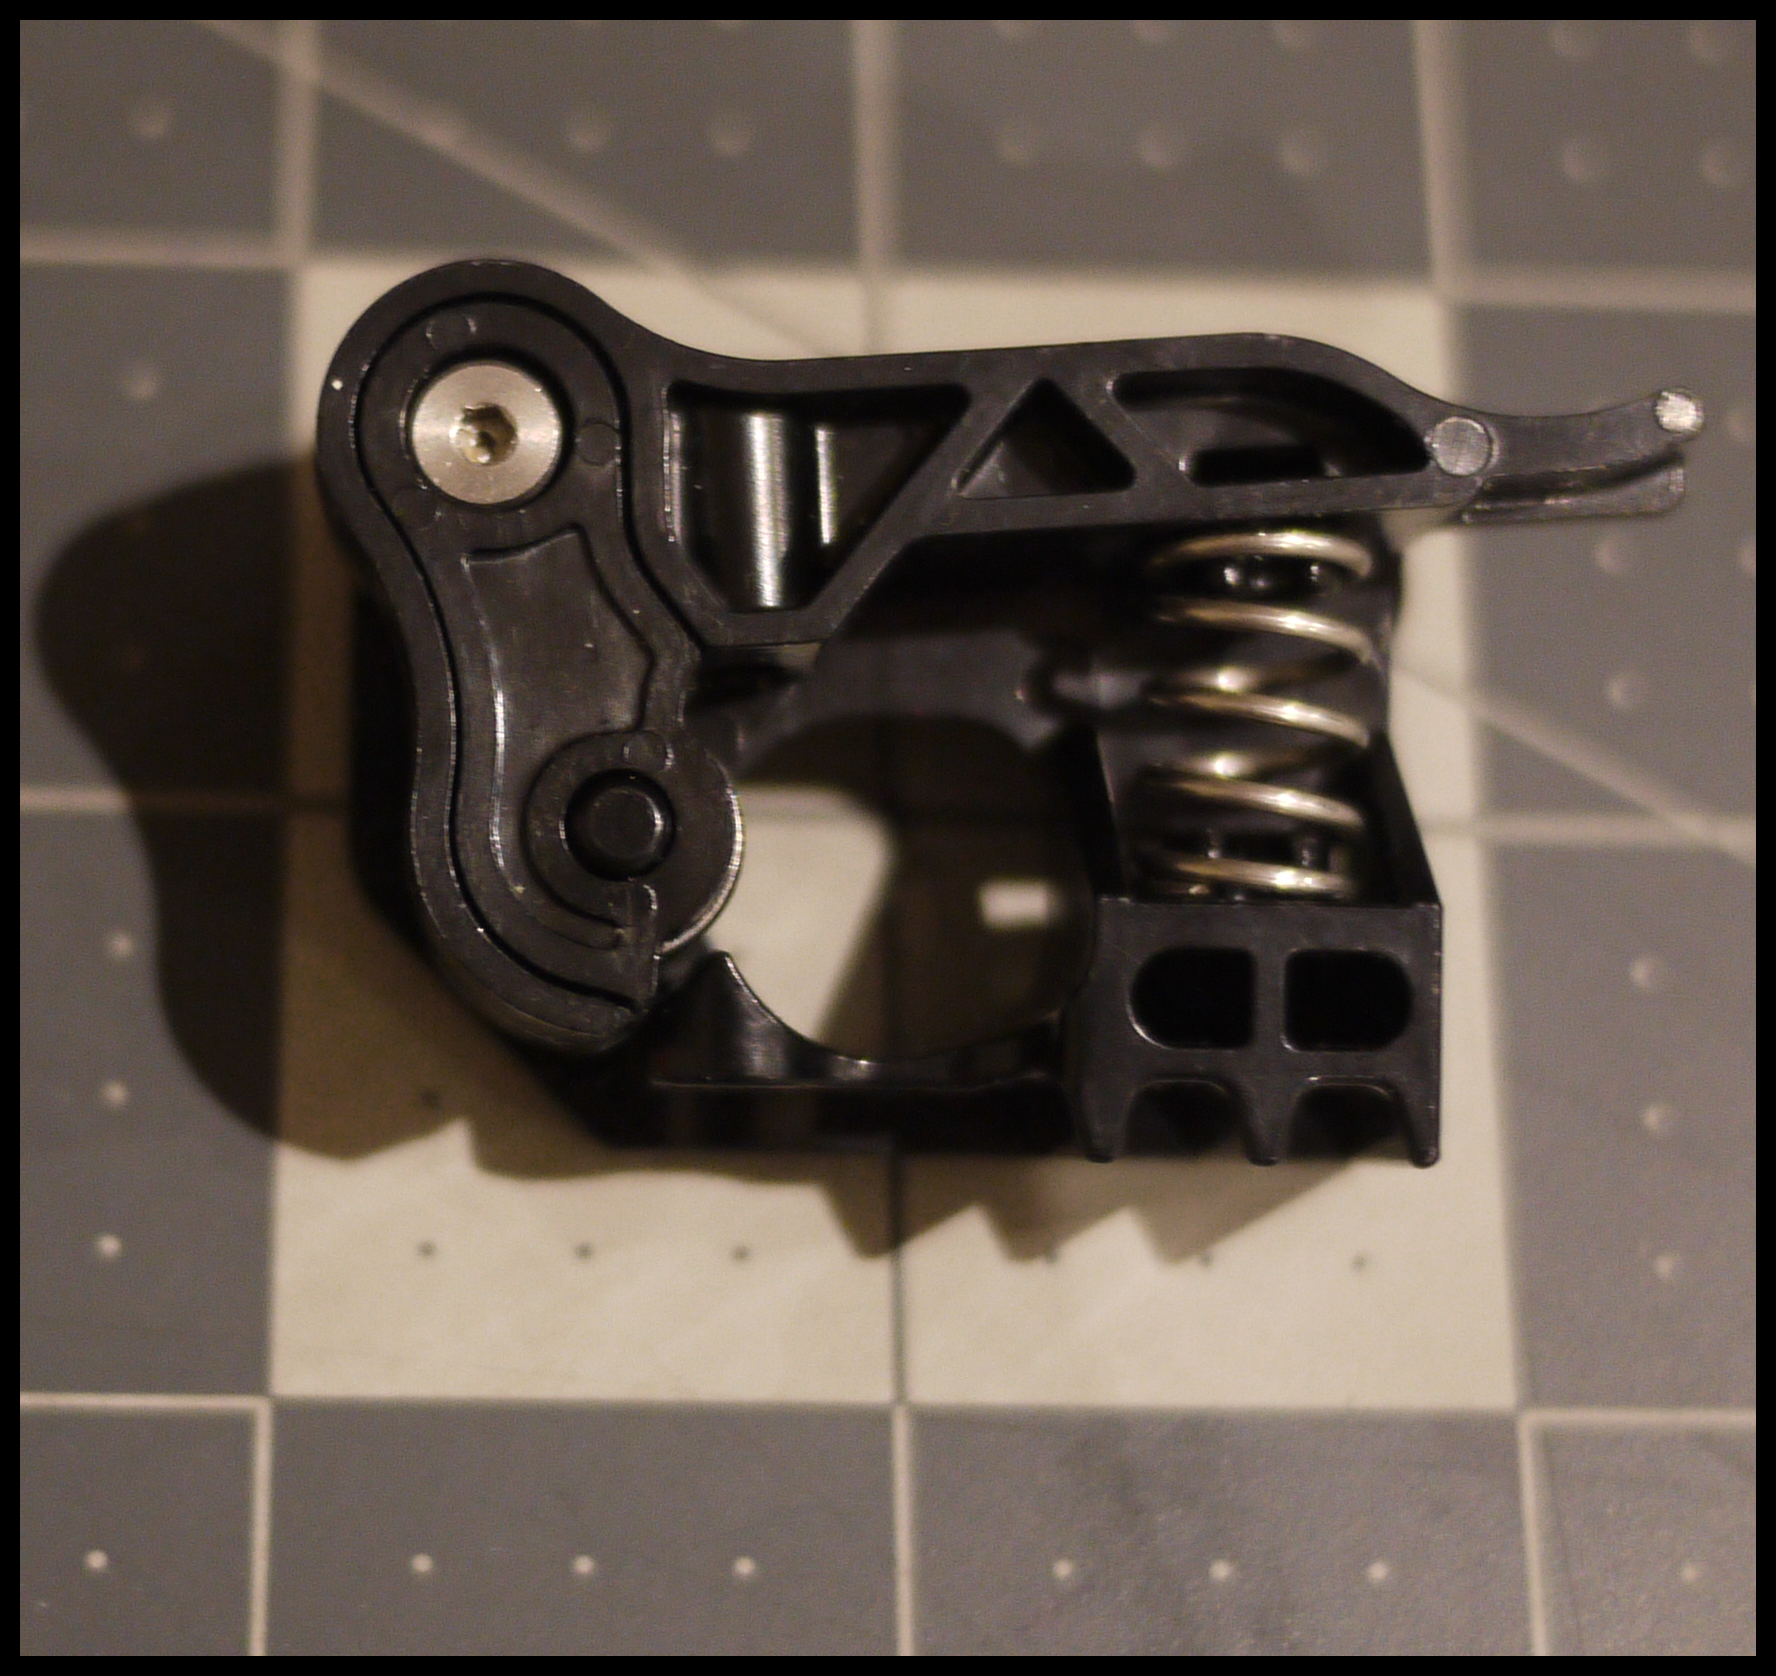
Similar spring problems have been encountered with the Replicator 2X extruders. In addition to fixing extruder feed problems, this upgrade is able to handle the high temperatures required by some filaments. Also, the spring pressure is variable to ensure reliable feeding with any filament available which makes it beneficial to many other printers based on the Replicator series. | |||||||||
Can I pay with my debit/credit card? | |||||||||
Even though you received an invoice via Paypal, you do not need a Paypal account to pay it. Paypal can process debit and credit cards using Guest Checkout.
It will process any major credit card and send you an email receipt of the transaction. | |||||||||
If you have a question which is not answered here, please email me. | |||||||||
Home |
Map |
Reviews | |||||||
| ©2013-2025 | |||||||||